
Make a Pig Marcelion amigurumi with this crochet pattern! Use basic stitches to create a lovable, plump toy pig. An ideal gift for kids or animal lovers or as a cute addition to any room or collection.
Crochet Pig Marcelion Amigurumi Pattern
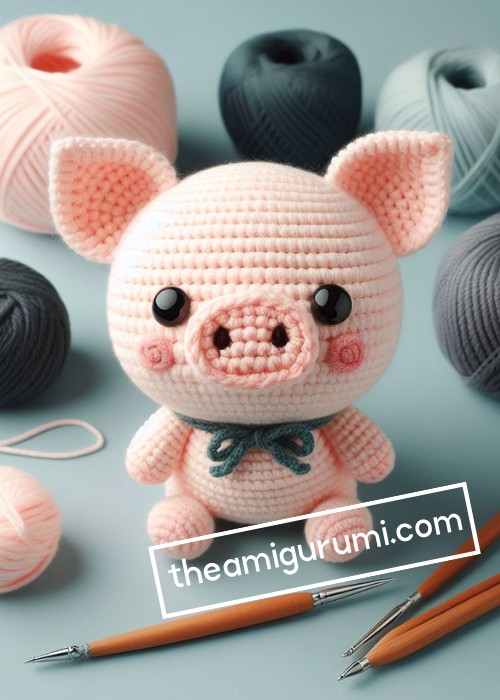
The Crochet Pig Marcelion Amigurumi Pattern allows for crafting a lovable pig named Marcelion. Donning a cozy scarf crocheted with soft pink yarn, this pig plushie exudes warmth and charm. The amigurumi pattern provides comprehensive instructions for the body, limbs, snout, ears, and scarf. This delightful crochet project, suited for all skill levels, produces a heartwarming piggy companion, perfect as a gift or an adorable addition to your collection.

Making The Crochet Pig Marcelion Amigurumi
Materials:
- Yarn:
- Light worsted weight yarn in pink, black, and white
- Crochet hook: Size H-8 (5mm)
- Safety eyes: 9mm
- Poly-fil stuffing
- Embroidery needle and thread
- Stitch marker (optional)
Step-by-step pattern
Body:
- Start with the main color (pink). Make a magic ring and chain 6.
- Work 12 single crochets (sc) into the ring. Close the ring by slipping a stitch into the first sc.
- [2 sc in each sc around] x2 (24 sc)
- [Sc in each sc, sc in the next sc] x6 (30 sc)
- Continue working in rounds of SC, increasing 6 stitches evenly around each round until you have 42 stitches.
- Place a stitch marker and work 8 rounds without increasing.
- Start decreasing by working [sc in each sc, sc in the next 2 sc] around.
- Continue decreasing by working [sc in each sc, sc in the next 3 sc] around, then [sc in each sc, sc in the next 4 sc] around, until you have 18 stitches remaining.
- Stuff the body firmly.
- Work 2 rounds of SC, then close the hole by pulling the yarn through the remaining stitches and tying it off.
Legs:
- Make 4 legs using the same color. Make a magic ring and chain 4.
- Work 8 sc into the ring. Close the ring by slipping a stitch into the first sc.
- [Sc in each sc] around.
- Continue working in rounds of sc, increasing 2 stitches evenly around each round until 12 stitches.
- Work 5 rounds without increasing.
- Stuff the leg firmly.
- Work 2 rounds of SC, then close the hole by pulling the yarn through the remaining stitches and tying it off.
Snout:
- Make the snout using the black yarn. Make a magic ring and chain 6.
- Work 6 sc into the ring. Close the ring by slipping a stitch into the first sc.
- Sc in each sc around.
- [Sc in each sc, inc in the next sc] around.
- [Sc in each sc, inc in the next 2 sc] around.
- Continue increasing in this way until you have 18 stitches.
- Stuff the snout lightly.
- Work 2 rounds of SC, then close the hole by pulling the yarn through the remaining stitches and tying it off.
Ears:
- Make 2 ears using the pink yarn. Make a magic ring and chain 4.
- Work 6 sc into the ring. Close the ring by slipping a stitch into the first sc.
- [2 sc in each sc] around.
- [Sc in each sc, sc in the next sc] around.
- [Sc in each sc] around.
- Fold the ear in half and sc around the edge to close.
Eyes:
- Attach the safety eyes to the face, following the package instructions.
Assembly:
- Sew the legs to the body, placing them evenly around the bottom.
- Sew the snout to the face, centering it below the eyes.
- Sew the ears to the top of the head, tilting them slightly forward.
- Embroider the nostrils using black thread.
Optional:
- You can add a tail by crocheting a chain of 5 stitches and sewing it to the back of the body.
- You can also add a blush to the cheeks using pink embroidery thread.


Leave a Reply