
Begin your crochet adventure with our Baby Hippo Tutorial, offering beginners a delightful way to make this charming companion using MOO DENG techniques.
Learn how to crochet an adorable Baby Hippo with our Tutorial designed especially for beginners. This step-by-step guide makes it easy to stitch together a cute and cuddly companion. Perfect as a handmade gift or a charming addition to your home decor, this project offers the joy of crafting something unique and personal. Benefits include relaxation, improved focus, and a sense of accomplishment as you see your hippo take shape. With simple instructions and helpful tips, it's an ideal way to begin your crochet journey and produce something beautiful with your own hands.

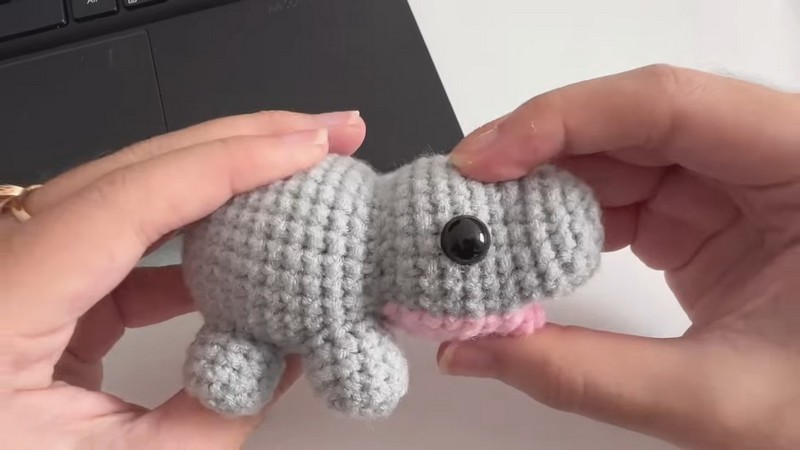
How To Crochet Amigurumi Baby Hippo
Tools:
- Crochet Hook: Used to crochet the stitches.
- Stitch Marker: To keep track of rounds and stitches.
- Needle: For sewing parts together.
Materials:
- Yarn: Different colors are used in the pattern.
- Gray Yarn
- Pink Yarn
- Black Yarn (for nostril details)
- White Yarn (for eye details)
- Safety Eyes: 8 mm size, although non-safety eyes are mentioned with an alternative to glue them.
- Stuffing: To fill the body and head.

Magic Ring for the Body:
- Forming the Magic Ring:
- Wrap yarn around two fingers.
- Pull yarn through the loops to create a ring.
- Make one chain to secure the ring.
- Remove ring from the fingers.
Round One:
- Six Single Crochets into the Magic Ring:
- Insert hook, pull yarn through, and create single crochets.
- Repeat until you have six single crochets.
- Tighten the ring by pulling the tail.
Round Two:
- Increasing Stitches:
- Begin with a single crochet in the first stitch of round one.
- Add a stitch marker on the first stitch of round two.
- Make another single crochet in the same stitch to increase.
- Repeat for each stitch, resulting in 12 single crochets.

Round Three to Fourteen:
- Expanding the Body:
- Round Three: Make a single crochet followed by an increase.
- Round Four: Make two single crochets followed by an increase.
- Round Five: Make three single crochets followed by an increase.
- Rounds Six to Fourteen:
- Make single crochets without increases.
Round Fifteen:
- Decreasing Stitches:
- Create decrease stitches by pulling through front loops of the next two stitches.
- Repeat decrease stitches all around, leaving the body finished.

Creating the Head:
- Starting the Head:
- Use the front loops for round one, making increase stitches with color changes.
- Begin with five increase stitches in gray, switch to pink yarn for the next five increases.
- Alternate colors as needed.
- Building Up the Head:
- Round Two: 10 single crochets in gray, switch to pink for next 10.
- Repeat pattern in rounds three to five.
- For round six, make three single crochets and a decrease stitch.
Mouth and Nose:
- Creating the Mouth:
- Attach pink yarn, make six chains.
- Slip stitch into next stitch, then single crochet along the chain.
- Forming the Nose:
- Continue from the head, making single crochets around including the mouth stitches.
- Fill the inside and shape accordingly.
- Insert safety eyes at specified positions.
Finalizing the Details:
- Decreasing the Head:
- For round nine, make decreases all around and secure.
- Adding the Nose Details:
- Sew additional lines on the nose for shape and fill as required.

Legs:
- Creating Legs:
- Make 10 single crochets in a magic ring.
- Continue rounds without increases to form legs.
- Sew legs securely onto the body.
Ears and Tail:
- Forming Ears and Tail (Same Pattern):
- Create small chain-based patterns.
- Attach and secure onto the head and body.
Final Touches:
- Details on Eyes:
- Add white yarn details on the eyes.
- Secure and hide yarn ends inside the head.
- Nose Adjustments:
- Adjust nose shape with additional sewing and pulling yarn tightly.
- Secure and hide yarn ends within the nose.
Finishing the Tutorial:
- Adding Nostrils (Optional):
- Use black yarn to sew small nostrils onto the nose.


Leave a Reply