
The Crochet Cute Baby Amigurumi Pattern is a fun, straightforward pattern for creating an adorable baby figure. This pattern is perfect for all crochet lovers, providing a heartwarming project and end product.

Crochet Cute Baby Amigurumi Pattern
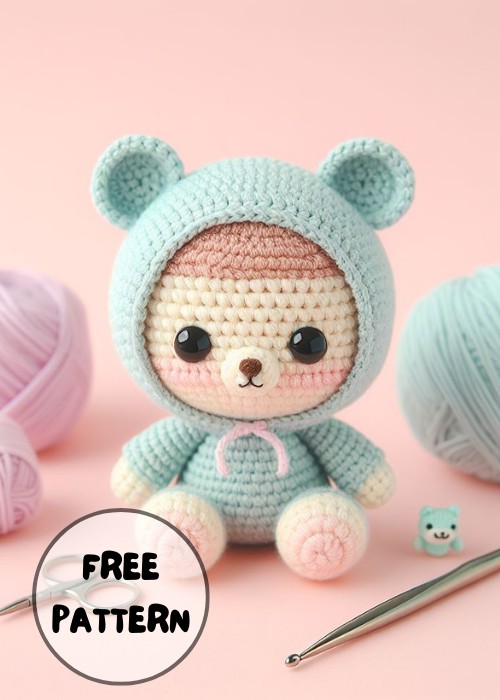
The Crochet Cute Baby Amigurumi Pattern enables you to craft an endearing baby soft toy. It contains details such as cheerful facial features, darling attire, and a compact structure. This pattern ensures a satisfying crochet journey, honing your skills. The final piece is a Cute Baby, a cozy playmate that adds a touch of heartwarming charm to anyone's amigurumi assortment, with its delightful features and detail.

Making the Crochet Cute Baby Amigurumi
Materials:
- Sport weight yarn in:
- Light tan
- Cream
- Black
- Pink
- Light brown
- 3.0mm crochet hook
- Polyester stuffing
- Tapestry needle
- Black embroidery thread
- Safety eyes (optional)

Step by step Pattern
Making the Head:
- Make a magic ring with the light tan yarn.
- Crochet 6 single crochets (sc) into the magic ring. Pull tight to close the ring.
- Increase by crocheting 2 sc in each stitch around. You should now have 12 sc.
- Continue increasing by crocheting 2 sc in every other stitch around until you have 18 sc.
- Continue crocheting around without increasing or decreasing for 7 rounds.
- Change to cream yarn and crochet 1 round.
- Change back to light tan yarn and crochet 2 rounds.
- Stuff the head firmly with stuffing.
- Decrease by crocheting 2 sc together around. You should now have 9 sc.
- Continue decreasing by crocheting 2 sc together around until you have 6 sc.
- Fasten off and leave a long tail for sewing.
Making the Ears:
- Make a magic ring with the light tan yarn.
- Crochet 4 sc into the magic ring. Pull tight to close the ring.
- Increase by crocheting 2 sc in each stitch around. You should now have 8 sc.
- Continue crocheting around without increasing or decreasing for 3 rounds.
- Decrease by crocheting 2 sc together around. You should now have 4 sc.
- Decrease by crocheting 2 sc together around. You should now have 2 sc.
- Fasten off and leave a long tail for sewing.
- Repeat steps 1-7 to make the second ear.
Making the Body:
- Make a magic ring with the light tan yarn.
- Crochet 6 sc into the magic ring. Pull tight to close the ring.
- Increase by crocheting 2 sc in each stitch around. You should now have 12 sc.
- Continue increasing by crocheting 2 sc in every other stitch around until you have 18 sc.
- Continue crocheting around without increasing or decreasing for 12 rounds.
- Stuff the body firmly with stuffing.
- Decrease by crocheting 2 sc together around until you have 15 sc.
- Continue decreasing by crocheting 2 sc together around until you have 12 sc.
- Continue decreasing by crocheting 2 sc together around until you have 9 sc.
- Continue decreasing by crocheting 2 sc together around until you have 6 sc.
- Fasten off and leave a long tail for sewing.
Making the Arms and Legs:
- Make a magic ring with the light tan yarn.
- Crochet 6 sc into the magic ring. Pull tight to close the ring.
- Increase by crocheting 2 sc in each stitch around. You should now have 12 sc.
- Continue crocheting around without increasing or decreasing for 6 rounds.
- Stuff the arm or leg firmly with stuffing.
- Decrease by crocheting 2 sc together around until you have 6 sc.
- Fasten off and leave a long tail for sewing.
- Repeat steps 1-7 to make the second arm and leg.
Making the Chair:
- Make a magic ring with the pink yarn.
- Crochet 6 sc into the magic ring. Pull tight to close the ring.
- Increase by crocheting 2 sc in each stitch around. You should now have 12 sc.
- Continue increasing by crocheting 2 sc in every other stitch around until you have 24 sc.
- Continue crocheting around without increasing or decreasing for 4 rounds.
- Change to cream yarn and crochet 1 round.
- Change back to pink yarn and crochet 2 rounds.
- Stuff the chair firmly with stuffing.
- Fold the top edge of the chair down and crochet a row of SC around the folded.


Leave a Reply