
Crochet a Vampire Mouse amigurumi using this crochet pattern! Simple instructions result in a unique, cute critter. Ideal as a playful gift for kids and Halloween enthusiasts or a quirky addition to any collection.
Crochet Vampire Mouse Amigurumi Pattern
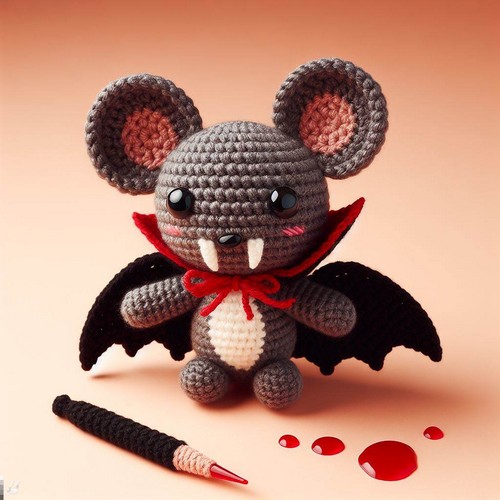
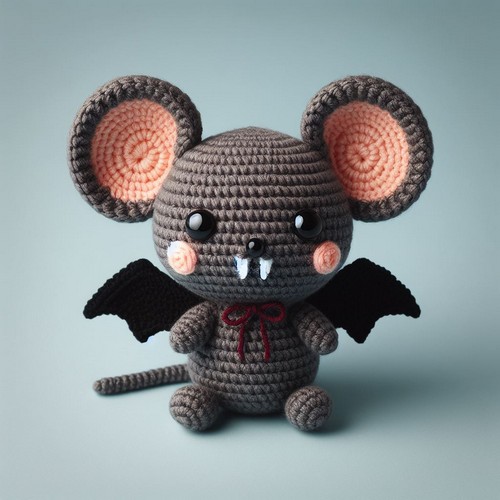
The Crochet Vampire Mouse Amigurumi Pattern helps you create a playful vampire mouse plushie. Clad in a vivid cape with pronounced teeth and pointy ears, this design injects a dash of fun into crochet crafting. The amigurumi pattern offers detail in all aspects, from the body to the cape to the pointed teeth. Suitable as a unique toy or quirky decoration, this crochet project will undoubtedly add a touch of eerie charm to your collection.
Making The Crochet Vampire Mouse Amigurumi
Materials:
- Size 3.25mm (D-3) crochet hook
- Worsted weight yarn in gray, black, white, and red
- 9mm safety eyes
- Polyester stuffing
- Yarn needle
- Black embroidery floss

Step-by-step pattern
Body:
- Start with the body by making a magic ring in gray yarn.
- Crochet 6 single crochets (sc) into the ring.
- Increase in each stitch around (12 sc).
- Continue crocheting around in sc, increasing 6 stitches evenly every other round until you have 36 sc.
- Place a marker at the start of the round.
- Continue crocheting in SC without increasing until the body measures about 4 inches long.
- Start stuffing the body as you crochet.
- Decrease by crocheting two sc together at the end of each round.
- Continue decreasing until you have only 6 sc remaining.
- Stuff the body firmly and close the hole by crocheting the remaining stitches together.
Head:
- Attach the black yarn to the body at the marked spot for the head.
- Make 6 sc in a magic ring.
- Increase in each stitch around (12 sc).
- Continue crocheting in SC, increasing 6 stitches evenly every other round until 30 sc.
- Place a marker at the start of the round.
- Continue crocheting in SC without increasing until the head measures about 3 inches tall.
- Start stuffing the head as you crochet.
- Decrease by crocheting two sc together at the end of each round.
- Continue decreasing until you have only 6 sc remaining.
- Stuff the head firmly and close the hole by crocheting the remaining stitches together.
Ears:
- Make 2 identical ears by crocheting a chain of 8 sc in gray yarn.
- Turn and sc in each stitch across.
- Chain 2 and turn. Sc in each stitch across, decreasing at the beginning and end of the row.
- Repeat row 3 until you have 2 sc remaining.
- Close the hole by crocheting the remaining stitches together.
Legs:
- Make 4 identical legs by crocheting a chain of 6 sc in gray yarn.
- Turn and sc in each stitch across.
- Chain 2 and turn. Sc in each stitch across, increasing at the beginning of each row.
- Continue increasing until the leg is the desired length.
- Stuff the leg firmly and close the hole by crocheting the remaining stitches together.
Assembly:
- Sew the ears to the top of the head.
- Sew the legs to the bottom of the body.
- Sew the eyes to the face.
- Add black French knots for the nostrils.
Cape:
- Attach the black yarn to the back of the neck.
- Chain 30 sc.
- Turn and sc in each stitch across.
- Repeat row 3 until the cape is the desired length.
- Sew the edges of the cape together to form a hood.
Collar:
- Make a chain of 10 sc in red yarn.
- Turn and sc in each stitch across.
- Repeat row 3 until the collar is the desired width.
- Sew the ends of the collar together to form a loop.
- Sew the collar around the neck of the mouse.
Teeth:
- Cut a small piece of white felt.
- Draw two sharp teeth on the felt.
- Cut out the teeth and glue them to the inside of the mouth.
Tips:
- You can use different colors of yarn for the body, head, ears, legs, cape, and collar.
- You can add other details to your vampire mouse, such as eyebrows, eyelashes, and a bat wing.
- Be sure to stuff the mouse firmly so that it keeps its shape.


Leave a Reply