
The Crochet Duck With Hat Amigurumi Pattern is a fun, easy-to-follow guide for craft enthusiasts. It comes with clear, step-by-step instructions, perfect for making adorable, plush ducks. I am delighted to make these cute toy ducks with this remarkable pattern.

Crochet Duck With Hat Amigurumi Pattern
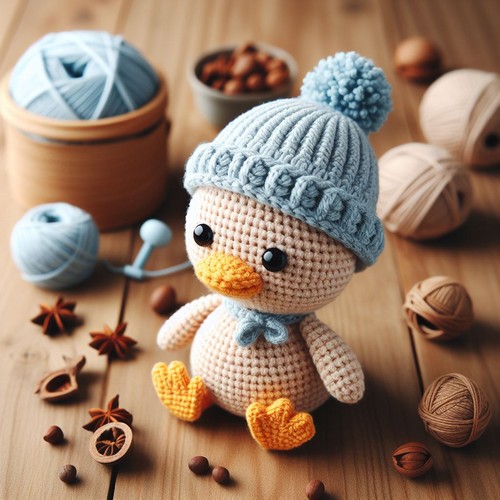
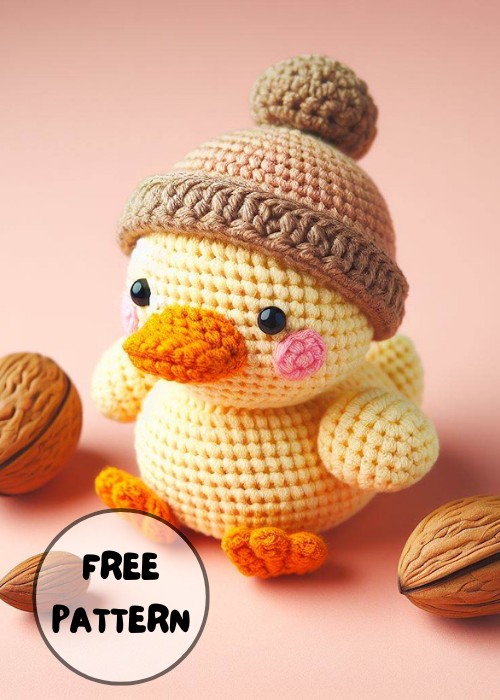
The Crochet Duck With Hat Amigurumi Pattern is an inviting guide for creating a lovable handmade duck toy. This charming amigurimi pattern features a round yellow duck, endearing facial details, and an irresistibly cute hat, making it suitable for crocheters with different skill sets. The finished duck, with its appealing attire, brings a warm touch of whimsy to any setting, perfect as a darling decor addition or a cuddly plush companion.
Crochet Duck With Hat Amigurumi
Materials:
- Yarn:
- Yellow worsted weight yarn for the body and beak
- Orange worsted weight yarn for the feet
- White worsted weight yarn for the hat and eyes
- Small amount of black worsted weight yarn for the pupils
- Crochet hook: 3.5mm or 4mm, depending on your yarn weight and desired amigurumi size
- Polyester stuffing: For filling the amigurumi
- Yarn needle: For assembling and embroidery
- Safety eyes (optional): 9mm black safety eyes can be used instead of embroidering the eyes

Step by step Pattern
Body:
- Start with the yellow yarn and make a magic ring.
- Crochet 6 single crochets (sc) into the ring.
- Increase in each stitch around (12 sc).
- Continue crocheting around in sc, increasing 6 stitches evenly spaced every other round until you have 36 sc.
- Place a marker at the start of the round.
- Continue crocheting in SC without increasing until the body measures about 2-3 inches tall.
- Start stuffing the body as you crochet.
- Decrease by crocheting two sc together at the end of each round until you have only 6 sc remaining.
- Stuff the body firmly and close the hole by crocheting the remaining stitches together.
Head:
- Attach the yellow yarn to the top of the body.
- Make 6 sc in a magic ring.
- Increase in each stitch around (12 sc).
- Continue crocheting around in sc, increasing 6 stitches evenly spaced every other round until 30 sc.
- Place a marker at the start of the round.
- Continue crocheting in sc without increasing until the head measures about 2-2.5 inches tall.
- Start stuffing the head as you crochet.
- Decrease by crocheting two sc together at the end of each round until only 6 sc remaining.
- Stuff the head firmly and close the hole by crocheting the remaining stitches together.
Beak:
- Using the orange yarn, make a chain of 6 sc.
- Turn and sc in each stitch across.
- Chain 2 and turn. Sc in each stitch across, increasing at the beginning of each row until the beak is about 3-4 stitches wide.
- Decrease by crocheting two sc together at the end of each row until you have 2 sc remaining.
- Close the hole by crocheting the remaining stitches together.
- Sew the beak to the face, slightly below the eyes.
Feet (optional):
- Make 2 identical feet by crocheting small chains of orange yarn and stuffing them lightly.
- Sew the feet to the bottom of the body.
Wings (optional):
- Make 2 identical wings by crocheting small triangles in yellow yarn.
- Sew the wings to the sides of the body.
Hat:
- Attach the white yarn to the top of the head.
- Make 6 sc in a magic ring.
- Increase in each stitch around (12 sc).
- Continue crocheting around in sc, increasing 6 stitches evenly spaced every other round until you have 36 sc.
- Place a marker at the start of the round.
- Continue crocheting in SC without increasing until the hat reaches the desired depth. You can make it a floppy beanie or a shorter-brimmed hat.
- Curl the brim of the hat by crocheting a few rounds of SC in the back loops only.
- Close the hole by crocheting the remaining stitches together.
Assembly:
- (Optional) If using safety eyes, sew them to the face.
- Otherwise, embroider the eyes using black yarn and white yarn for the pupils.
- Add other facial details with embroidery, such as eyebrows and cheeks (optional).
Tips:
- You can adjust the size of the duck by using a different yarn weight or crochet hook size.
- Be sure to stuff the amigurumi firmly so that it keeps its shape.
- You can add other details to your duck, such as a tail or a scarf.
- Get creative with the hat color and style!


Leave a Reply