
Discover crocheting joy with the Crochet Totoro Amigurumi Pattern. This delightful pattern allows you to crochet an endearing Totoro, ideal as a gift for anime enthusiasts. With its simple and direct instructions, it's an enjoyable craft activity suitable for crochet artists of all abilities.
Crochet Totoro Amigurumi Pattern
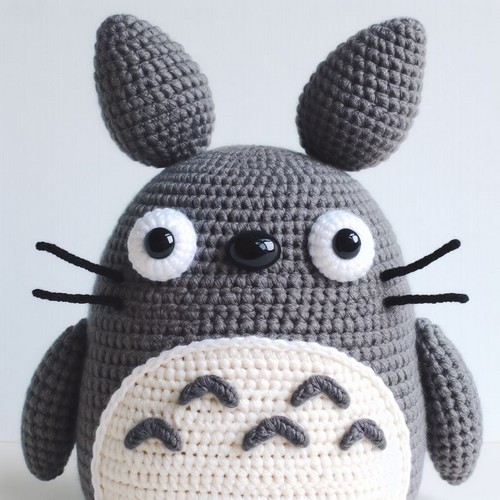
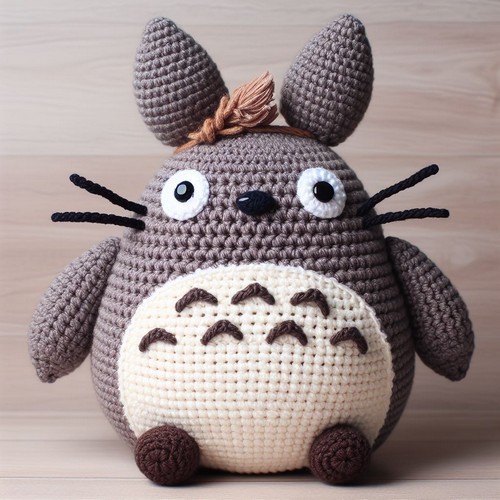
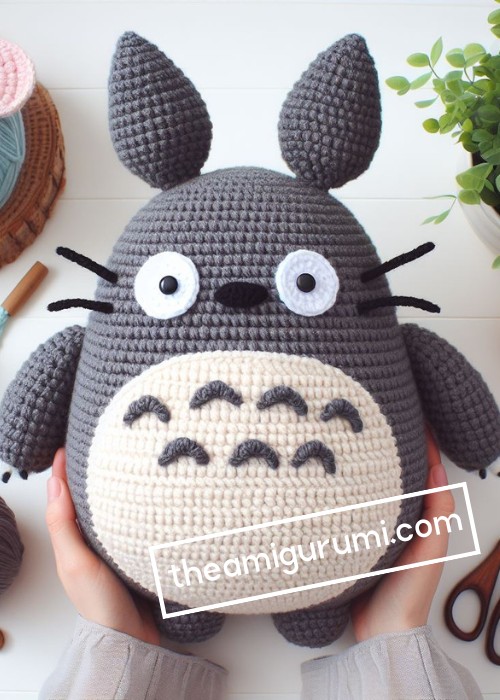
The Crochet Totoro Amigurumi Pattern guides you in creating a beloved Totoro character from intricate crochet stitches. Notable features include his distinctive grin, rounded body, and large, attentive eyes. This amigurumi pattern provides an enjoyable project that hones crochet skills, all while creating a cherished animation character. The end result is a snug Totoro, ready to bring whimsy and delight to any amigurumi collection.
Making the Crochet Totoro Amigurumi
Materials:
- Worsted-weight yarn in grey, white, and black
- Crochet hook (size suitable for your yarn)
- Stuffing
- Tapestry needle
- Scissors
- Safety eyes (optional)
- Stitch markers (optional)
Step by step Pattern
Body:
- Start with the grey yarn and make a magic ring.
- Crochet 6 single crochets (sc) into the ring.
- Increase in each stitch around (12 sc).
- Place a stitch marker to mark the beginning of the round.
- Continue crocheting in rounds of sc, increasing in every other stitch until 24 sc.
- Work without increasing until the body reaches the desired length.
- Stuff the body firmly as you crochet, leaving an opening at the top for stuffing the head.
- Start decreasing by crocheting two sc together in every other stitch.
- Continue decreasing until you have a small opening.
- Stuff the head firmly and close the opening with a few stitches.
- Finish off and weave in the ends.
Head:
- Attach the grey yarn to the body where the neck should be.
- Make a magic ring and work 6 sc into the ring.
- Increase in each stitch around (12 sc).
- Place a stitch marker to mark the beginning of the round.
- Continue crocheting in rounds of sc, increasing in every other stitch until 18-24 sc, depending on the desired head size.
- Work without increasing for a few rounds.
- Start decreasing by crocheting two sc together in every other stitch.
- Continue decreasing until you have 6 sc.
- Finish off and weave in the ends.
Ears (make 2):
- Attach the grey yarn to the top of the head.
- Chain 4 sc.
- Turn and sc in the back loops only of the chain (3 sc).
- Decrease at the beginning and end of the row.
- Continue decreasing until you have 1 sc.
- Finish off and weave in the ends.
- Sew the ears to the top of the head.
Eyes:
- Sew on the safety eyes to the face or embroider small black circles for the eyes.
Nose:
- The embroidery has a small oval nose with black yarn.
Whiskers (optional):
- Cut three small pieces of black yarn.
- Thread the yarn through a tapestry needle and sew them onto the face, evenly spaced on either side of the nose.
Belly:
- Attach the white yarn to the bottom of the body.
- Crochet a round of sc around the base of the body.
- Continue crocheting in rounds of sc, increasing as needed to create a half-circle shape for the belly.
- Fasten off and weave in the ends.
Legs (make 3):
- Attach the grey yarn to the bottom of the body.
- Chain 10 sc.
- Work without increasing until the leg reaches the desired length.
- Stuff the leg lightly as you crochet.
- Decrease at the beginning of each round until you have 4 sc.
- Finish off and weave in the ends.
- Sew the legs to the bottom of the body, spacing them evenly.
Tail:
- Attach the grey yarn to the back of the body.
- Chain the desired length for the tail.
- Single crochet back down the chain, creating a loop.
- Repeat steps 2 and 3 to create the desired fullness of the tail.
- Stuff the tail lightly as you crochet.
- Finish off and weave in the ends.
Assembly:
- Add a small red scarf around Totoro's neck (optional).


Leave a Reply