
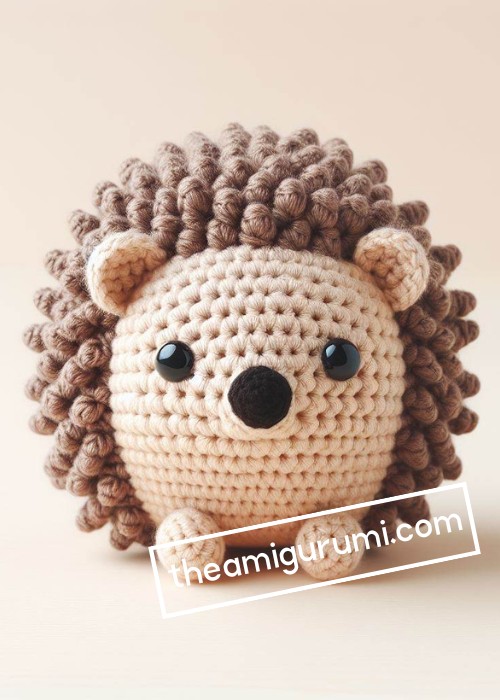
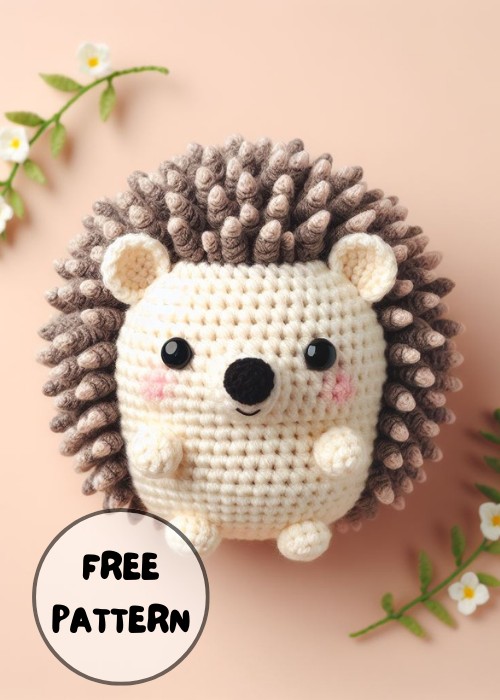
Find pleasure in crafting with the Crochet Hedgehog Amigurumi Pattern. This enjoyable pattern guides the creation of a playful hedgehog, perfect for gifts or as a decorative piece. With easy-to-follow steps, this activity suits all crochet enthusiasts, regardless of their experience.

Crochet Hedgehog Amigurumi Pattern
The Crochet Baby Girl Amigurumi Pattern provides instructions to craft a darling miniature baby girl doll. It features intricate detailing, such as expressive facial features, adorable outfits, and petite dimensions. This amigurumi pattern offers a satisfying challenge to crochet enthusiasts. The completed doll is a charming and huggable addition to any amigurumi collection, giving immense satisfaction with her cute aesthetics and soft texture.

Making the Crochet Hedgehog Amigurumi
Materials:
- Worsted-weight yarn in brown, grey, and black
- Crochet hook (size suitable for your yarn)
- Stuffing
- Tapestry needle
- Scissors
- Safety eyes (optional)
- Stitch markers (optional)
Step by step Pattern
Body:
- Start with the brown yarn and make a magic ring.
- Crochet 6 single crochets (sc) into the ring.
- Increase in each stitch around (12 sc).
- Place a stitch marker to mark the beginning of the round.
- Continue crocheting in rounds of sc, increasing in every other stitch until 24 sc.
- Work without increasing until the body reaches the desired length.
- Stuff the body firmly as you crochet, leaving an opening at the top for stuffing the head.
- Start decreasing by crocheting two sc together in every other stitch.
- Continue decreasing until you have a small opening.
- Stuff the head firmly and close the opening with a few stitches.
- Finish off and weave in the ends.
Head:
- Attach the brown yarn to the body where the neck should be.
- Make a magic ring and work 6 sc into the ring.
- Increase in each stitch around (12 sc).
- Place a stitch marker to mark the beginning of the round.
- Continue crocheting in rounds of sc, increasing in every other stitch until you have 18 sc.
- Work without increasing for 4-5 rounds.
- Start decreasing by crocheting two sc together in every other stitch.
- Continue decreasing until you have 6 sc.
- Finish off and weave in the ends.
Legs (make 2):
- Attach the grey yarn to the body.
- Chain 10 sc.
- Work without increasing until the leg reaches the desired length (around 10 rounds).
- Stuff the leg lightly as you crochet.
- Decrease at the beginning of each round until you have 4 sc.
- Finish off and weave in the ends.
- Sew the legs to the bottom of the body, angling them slightly outwards.
Ears (make 2):
- Attach the grey yarn to the top of the head.
- Chain 4 sc.
- Turn and sc in the back loops only of the chain (3 sc).
- Decrease at the beginning and end of the row.
- Continue decreasing until you have 1 sc.
- Finish off and weave in the ends.
- Sew the ears to the top of the head.
Spikes:
- Attach the grey yarn to the top of the body, between the ears.
- Chain 5 sc.
- Slip stitch in the second chain from the hook to form a loop.
- Crochet in a spiral for a few rounds, increasing at the beginning of each round to create a triangular spike.
- Change colors to black for the last round or two.
- Finish off and weave in the ends.
- Repeat steps 2-6 to place more spikes randomly around the body.
Face:
- Sew on the safety eyes to the face.
- Embroider has a small nose and mouth with black yarn.
Assembly:
- You can add a small black loop to the back of the head for hanging (optional).
Tips:
- You can adjust the size of the amigurumi by using different yarn weights and crochet hook sizes.
- Be creative and have fun with the details! You can add different colors or patterns to the spikes.
- If you are a beginner, you may want to use stitch markers to help you keep track of


Leave a Reply