
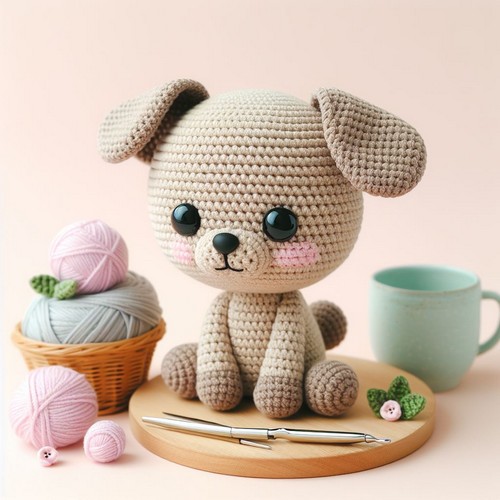
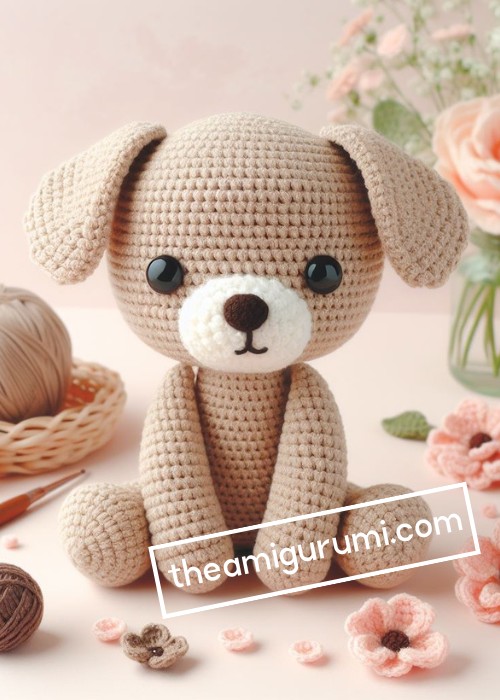
The Crochet Puppy Amigurumi Pattern is an engaging, beginner-friendly guide to crafting a lovable puppy toy. Tending to all skill levels, it makes for a fun crochet journey leading to a delightful creation.
Crochet Puppy Amigurumi Pattern
The Crochet Puppy Amigurumi Pattern helps you create a darling puppy toy. It involves special features like playful ears, an endearing face, and a cuddly structure. It's a fun crochet amigurumi project that also refines your skills. The finished product is a cuddly Puppy, handcrafted from crochet stitches, ready to bring joy and companionable charm to any toy collection with its winsome details.

Making the Crochet Puppy Amigurumi
Materials:
- Worsted weight yarn in your desired colors (brown, cream, black, and pink in the example)
- Crochet hook H/8 (5mm)
- Safety eyes (optional)
- Embroidery floss (optional)
- Fiberfill
- Tapestry needle
Step by step Pattern
Gauge:
16 stitches and 16 rows in single crochet equal 4 inches
Body:
- Make 6 single crochets (sc) in a magic ring and tighten.
- Increase by crocheting 2 sc in each stitch around (12 sc total).
- Increase by crocheting 2 sc in every other stitch around (18 sc total).
- Continue crocheting around, increasing by 2 sc in every other stitch until you reach 30 sc.
- Continue crocheting around without increasing or decreasing for 7 rounds.
- Start stuffing the body with fiberfill.
- Decrease by crocheting 2 sc together around (24 sc total).
- Continue decreasing by crocheting 2 sc together around until you have 18 sc.
- Decrease by crocheting 2 sc together around until you have 12 sc.
- Fasten off and leave a long tail for sewing.
Head:
- Make 6 sc in a magic ring and tighten.
- Increase by crocheting 2 sc in each stitch around (12 sc total).
- Increase by crocheting 2 sc in every other stitch around (18 sc total).
- Continue crocheting around, increasing by 2 sc in every other stitch until you reach 24 sc.
- Continue crocheting around without increasing or decreasing for 5 rounds.
- Stuff the head with fiberfill.
- Decrease by crocheting 2 sc together around (20 sc total).
- Continue decreasing by crocheting 2 sc together around until you have 16 sc.
- Continue decreasing by crocheting 2 sc together around until you have 12 sc.
- Continue decreasing by crocheting 2 sc together around until you have 8 sc.
- Fasten off and leave a long tail for sewing.
Ears:
- Make 6 sc in a magic ring and tighten.
- Increase by crocheting 2 sc in each stitch around (12 sc total).
- Continue crocheting around without increasing or decreasing for 3 rounds.
- Decrease by crocheting 2 sc together around (10 sc total).
- Continue decreasing by crocheting 2 sc together around until you have 8 sc.
- Continue decreasing by crocheting 2 sc together around until you have 6 sc.
- Fasten off and leave a long tail for sewing.
- Repeat steps 1-7 to make the second ear.
Legs:
- Make 6 sc in a magic ring and tighten.
- Increase by crocheting 2 sc in each stitch around (12 sc total).
- Continue crocheting around without increasing or decreasing for 7 rounds.
- Stuff the leg with fiberfill.
- Decrease by crocheting 2 sc together around (10 sc total).
- Continue decreasing by crocheting 2 sc together around until you have 8 sc.
- Continue decreasing by crocheting 2 sc together around until you have 6 sc.
- Fasten off and leave a long tail for sewing.
- Repeat steps 1-8 to make the second leg.
Tail:
- Make 6 sc in a magic ring and tighten.
- Increase by crocheting 2 sc in each stitch around (12 sc total).
- Continue crocheting around without increasing or decreasing for 6 rounds.
- Stuff the tail with fiberfill.
- Decrease by crocheting 2 sc together around (10 sc total).
- Continue decreasing by crocheting 2 sc together around until you have 6 sc.
- Continue decreasing by crocheting 2 sc together around until you have 4 sc.
- Fasten off and leave a long tail for sewing.
Assembly:
- Attach the ears to the head.


Leave a Reply