
The Crochet Dog Puppy Bruno Amigurumi Pattern is a cute, straightforward guide for creating a playful Bruno puppy toy. Accessible to all, it promises an amusing crochet session and a precious handmade pal.

Crochet Dog Puppy Bruno Amigurumi Pattern
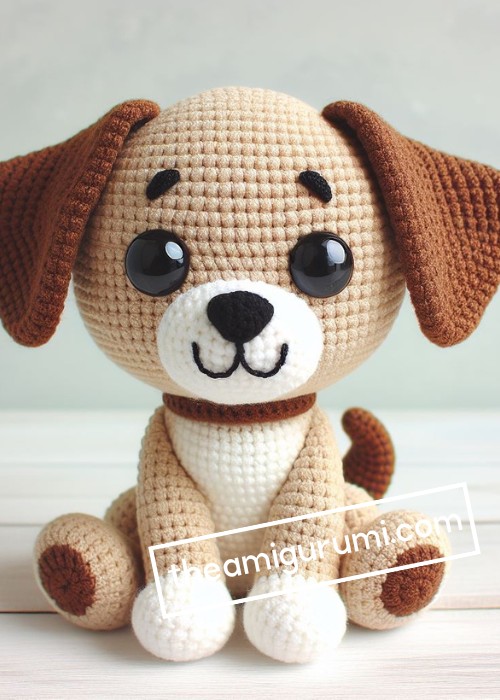
The Crochet Dog Puppy Bruno Amigurumi Pattern lets you handcraft a playful puppy toy, Bruno. This crochet emigurumi pattern details characteristics like floppy ears, adorable paws, and expressive eyes. An engaging crochet project, it also enhances your crafting finesse. The final outcome is a delightful Puppy Bruno, adding an adorable dimension to any toy collection with its lifelike form and cute design elements.

Making the Crochet Dog Puppy Bruno Amigurumi
Materials:
- Black yarn
- White yarn
- Orange yarn (small amount)
- Crochet hook (H-8 or 5.0mm)
- Safety eyes (10mm or 12mm)
- Fiberfill stuffing
- Tapestry needle
- Scissors
Step by step Pattern
Body:
- Start with black yarn and make a magic ring.
- Crochet 6 single crochets (sc) in the ring, slip stitch to join (round 1).
- Increase by crocheting 2 sc in each stitch around (12 sc, round 2).
- Continue crocheting sc around, increasing by 1 sc evenly around each round until you have 30 sc (round 8).
- Crochet 10 rounds without increasing (rounds 9-18).
- Stuff the body firmly with fiberfill.
- Decrease by crocheting 2 sc together around (20 sc, round 19).
- Continue crocheting sc around, decreasing by 1 sc evenly around each round until you have 12 sc (round 27).
- Cut the yarn, leaving a long tail for sewing.
Belly:
- Switch to white yarn and make a magic ring.
- Crochet 6 sc in the ring, slip stitch to join (round 1).
- Increase by crocheting 2 sc in each stitch around (12 sc, round 2).
- Continue crocheting sc around, increasing by 1 sc evenly around each round until you have 24 sc (round 7).
- Crochet 4 rounds without increasing (rounds 8-11).
- Sew the belly to the body, aligning the edges carefully.
Wings (make 2):
- Start with black yarn and chain 10 stitches.
- Sc in the second chain from the hook, sc in each stitch across to the end (9 sc).
- Chain 2, turn.
- Sc in each stitch across, sc in the turning chain (10 sc).
- Continue crocheting sc rows back and forth, increasing 1 sc at each end of every row until you have 17 sc.
- Shape the wing by crocheting 3 sc, 2 sc together, 9 sc, 2 sc together, 3 sc.
- Continue crocheting sc rows back and forth, decreasing 1 sc at each end of every row until you have 9 sc.
- Stuff the wings lightly with fiberfill.
- Sew the wings to the body on the sides.
Head:
- Start with black yarn and make a magic ring.
- Crochet 6 sc in the ring, slip stitch to join (round 1).
- Increase by crocheting 2 sc in each stitch around (12 sc, round 2).
- Continue crocheting sc around, increasing by 1 sc evenly around each round until you have 24 sc (round 7).
- Crochet 7 rounds without increasing (rounds 8-14).
- Stuff the head firmly with fiberfill.
- Decrease by crocheting 2 sc together (18 sc, round 15).
- Continue crocheting sc around, decreasing by 1 sc evenly around each round until you have 12 sc (round 19).
- Cut the yarn, leaving a long tail for sewing.
Beak:
- Switch to orange yarn and chain 4 stitches.
- Sc in the second chain from the hook, each stitch across to the end (3 sc).
- Stuff the beak lightly with fiberfill.
- Sew the beak to the face.
Eyes:
- Sew on the safety eyes.
Finishing touches:
- You can embroider a small smile on the face using black embroidery thread (optional).
- You can also add a small black bowtie to the chest using black yarn (optional).


Leave a Reply