
The Crochet Chameleon Amigurumi Pattern is a breezy and exciting guide to creating a unique chameleon toy. Suitable for all skill levels, this pattern offers a fun crafting experience with a quirky outcome.
Crochet Chameleon Amigurumi Pattern
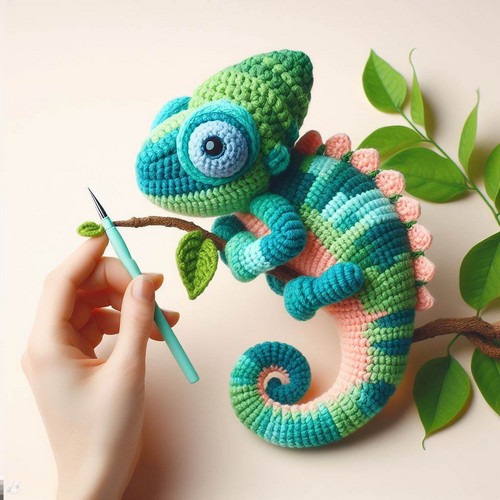
The Crochet Chameleon Amigurumi Pattern offers a guide to creating an attractive chameleon toy. It spotlights features like a curled tail, expressive eyes, and a colorful body. It's a delightful crochet task that also refines your artistic prowess. Once completed, you get a whimsical Chameleon, a charming model of textured crochet stitches that adds an exotic splash of color and character to any toy collection.

Making the Crochet Chameleon Amigurumi
Materials:
- Sport weight yarn in:
- Green
- Pink
- White
- Black
- Brown
- Orange
- Light green
- 3.5mm crochet hook
- Polyester stuffing
- Tapestry needle
- Black embroidery thread
- Safety eyes (optional)

Step by step Pattern
Making the Head:
- Start with the Open-Mouth Head Base: Follow the instructions in the Ami Amour pattern for crocheting the open-mouth head base using green yarn.
- Continue with the Head:
- Change to pink yarn and crochet 1 round around the base.
- Change back to green yarn and crochet 3 rounds.
- Make 6 single crochets (sc) in each of the next 3 rounds (18 sc total).
- Crochet 1 round without increasing.
- Stuff the head firmly with stuffing.
- Decrease by crocheting 2 sc together around until you have 12 sc.
- Fasten off and leave a long tail for sewing.
Making the Body:
- Make a magic ring with green yarn.
- Crochet 6 sc into the magic ring. Pull tight to close the ring.
- Increase by crocheting 2 sc in each stitch around. You should now have 12 sc.
- Continue increasing by crocheting 2 sc in every other stitch until you have 18 sc.
- Continue crocheting around without increasing or decreasing until you reach your desired body length.
- Stuff the body firmly with stuffing.
- Decrease by crocheting 2 sc together around until you have 12 sc.
- Continue decreasing by crocheting 2 sc together around until you have 6 sc.
- Fasten off and leave a long tail for sewing.
Making the Tail:
- Make a magic ring with green yarn.
- Crochet 6 sc into the magic ring. Pull tight to close the ring.
- Increase by crocheting 2 sc in each stitch around. You should now have 12 sc.
- Continue increasing by crocheting 2 sc in every other stitch until you have 18 sc.
- Continue crocheting around without increasing or decreasing for 8-10 rounds.
- Stuff the tail loosely with stuffing.
- Decrease by crocheting 2 sc together around until you have 12 sc.
- Continue decreasing by crocheting 2 sc together around until you have 6 sc.
- Fasten off and leave a long tail for sewing.
Making the Legs (4 legs):
- Make a magic ring with green yarn.
- Crochet 4 sc into the magic ring. Pull tight to close the ring.
- Increase by crocheting 2 sc in each stitch around. You should now have 8 sc.
- Continue crocheting around without increasing or decreasing for 8 rounds.
- Stuff the legs lightly with stuffing.
- Change to brown yarn and crochet 1 round. (Optional)
- Fasten off and leave a long tail for sewing.
Making the Eyes:
- Attach safety eyes or embroider eyes using black embroidery thread.
Making the Mouth:
- Embroider a small smile using black embroidery thread.
Making the Branch:
- Use brown yarn to crochet a long chain and single crochet back down the chain to create a simple branch shape.
Assembly:
- Sew the head to the body.
- Sew the tail to the body.
- Sew the legs to the body.
- Sew the chameleon onto the branch.
Tips:
- You can customize the colors of your chameleon to match your own preferences.
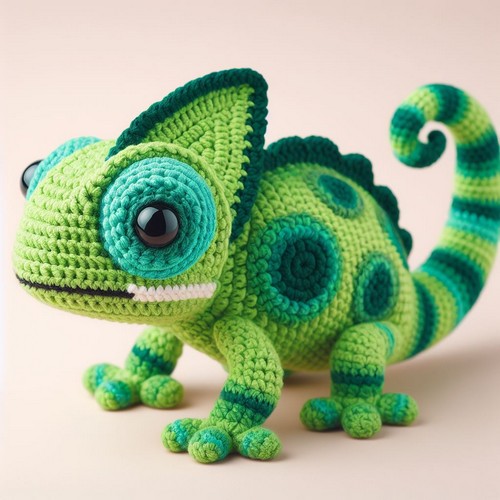
- You can add additional details to your chameleon, such as spots.


Leave a Reply