
The Crochet Cat Mermaid Amigurumi Pattern is an attractive, easy-to-use guide for craft lovers. Best suited to creating enchanting, plush cat mermaids, it offers step-by-step, straightforward instructions. Delight in creating these magical toy cat mermaids with this unique pattern.
Crochet Cat Mermaid Amigurumi Pattern
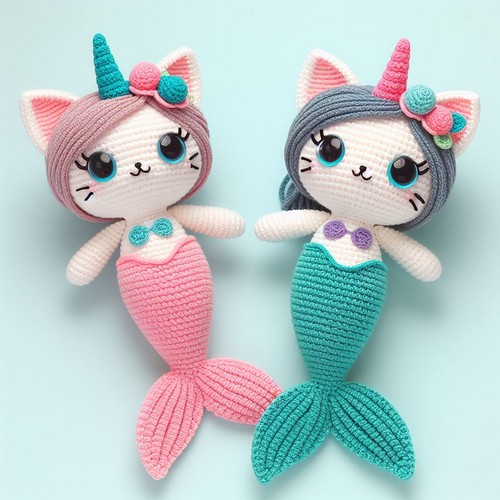
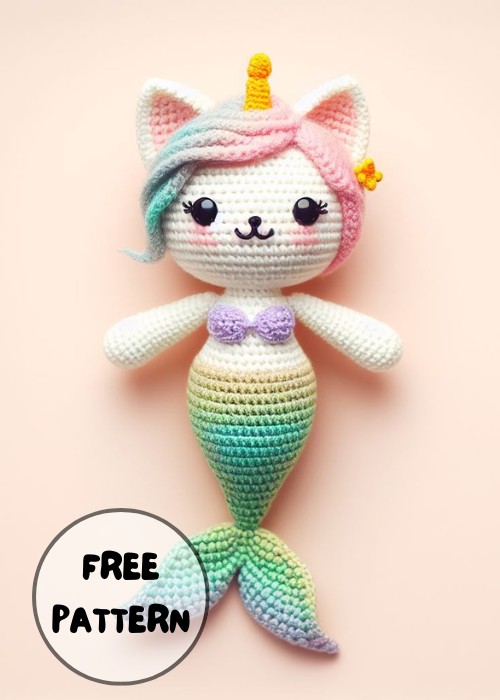
The Crochet Cat Mermaid Amigurumi Pattern is a whimsical crochet blueprint that makes a darling, hand-finished mermaid cat toy. Characterized by its cat-like face, mermaid tail, and fun accessories such as a crown and seashell bracelet, this pattern is suited for different crochet skill levels. It yields a delightful fantasy creature that adds a touch of magic and handcrafted charm to any setting.

Making Your Crochet Cat Mermaid Amigurumi
Materials:
- Yarn:
- Light gray worsted weight yarn for the body and tail
- Pink worsted-weight yarn for the arms and cheeks
- Small amounts of black, white, and light pink worsted-weight yarn for the eyes, nose, and mouth
- Optional: Green and yellow worsted-weight yarn for seaweed and starfish (if you want to add them)
- Crochet hook: 3.5mm or 4mm, depending on your yarn weight and desired amigurumi size
- Safety eyes: 9mm
- Polyester stuffing: For filling the amigurumi
- Yarn needle: For assembling and embroidery
- Black embroidery floss: For eyebrows (optional)

Step by step Pattern
Body:
- Start with the light gray yarn and make a magic ring.
- Crochet 6 single crochets (sc) into the ring.
- Increase in each stitch around (12 sc).
- Continue crocheting around in sc, increasing 6 stitches evenly spaced every other round until you have 36 sc.
- Place a marker at the start of the round.
- Continue crocheting in SC without increasing until the body measures about 3-4 inches tall.
- Start stuffing the body as you crochet.
- Decrease by crocheting two sc together at the end of each round.
- Continue decreasing until you have only 6 sc remaining.
- Stuff the body firmly and close the hole by crocheting the remaining stitches together.
Tail:
- Attach the light gray yarn to the bottom of the body.
- Make a chain of 15 sc.
- Turn and sc in each stitch across.
- Chain 2 and turn. Sc in each stitch across, increasing at the beginning of each row.
- Continue increasing until the tail fin is the desired width.
- Decrease by crocheting two sc together at the end of each row until you have 6 sc remaining.
- Close the hole by crocheting the remaining stitches together.
- Shape the tail fin by gently folding and sewing the edges together.
Arms:
- Using the pink yarn, make a chain of 6 sc.
- Turn and sc in each stitch across.
- Chain 2 and turn. Sc in each stitch across, increasing at the beginning of each row.
- Continue increasing until the arm is the desired length.
- Stuff the arm lightly and close the hole by crocheting the remaining stitches together.
- Repeat steps 1-5 to make a second arm.
Head:
- Attach the light gray yarn to the top of the body.
- Make 6 sc in a magic ring.
- Increase in each stitch around (12 sc).
- Continue crocheting in sc, increasing 6 stitches evenly spaced every other round until 30 sc.
- Place a marker at the start of the round.
- Continue crocheting in SC without increasing until the head measures about 2.5-3 inches tall.
- Start stuffing the head as you crochet.
- Decrease by crocheting two sc together at the end of each round.
- Continue decreasing until you have only 6 sc remaining.
- Stuff the head firmly and close the hole by crocheting the remaining stitches together.
Assembly:
- Sew the arms to the sides of the body.
- Sew the safety eyes to the face.
- Using the black yarn and a yarn needle, embroider a small nose and eyebrows (optional).
- Using the pink yarn and a yarn needle, embroider small circles for the cheeks.
- Using the white yarn and a yarn needle, embroider a small mouth.
Optional details:
- Add green and yellow yarn details to create seaweed and a starfish around the base of the tail.
- Add a small seashell or pearl to the head for decoration.


Leave a Reply