
The Crochet Turtle Amigurumi Pattern is a delightful guide for making a lovable turtle plushie. This easy-to-understand pattern is perfect for crafters of all levels, resulting in an endearing soft toy.

Crochet Turtle Amigurumi Pattern
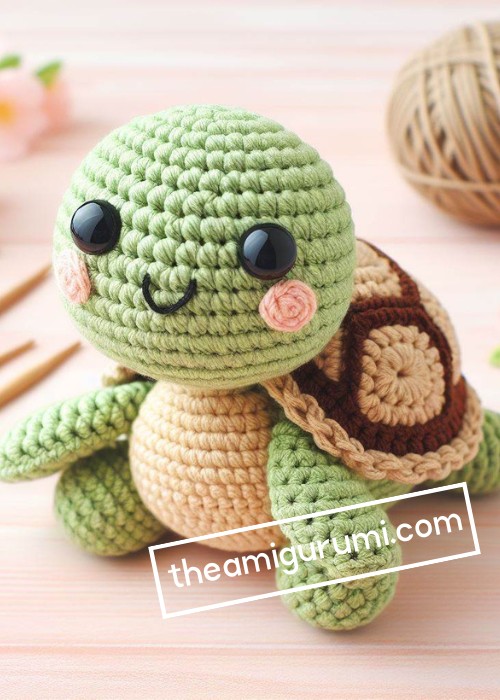
The Crochet Turtle Amigurumi Pattern is an enchanting blueprint for crafting a delightful turtle toy. This enchanting pattern features a detailed shell, tiny flippers, and expressive eyes on a lovable turtle face. Perfect for crocheters of all abilities, this Turtle Amigurumi brings the serene charm of aquatic life into your collection of handmade companions.

Making the Crochet Turtle Amigurumi
Materials:
- Yarn:
- Green yarn for the body and shell
- Cream yarn for the belly and head
- Black yarn for the eyes and mouth
- A small amount of white yarn for the eyes (optional)
- Crochet hook: Size suitable for your yarn weight (I used a 3.5mm hook for worsted weight yarn)
- Stuffing: Polyester fiberfill
- Tapestry needle: For sewing the pieces together
- Scissors: To cut the yarn
- Safety eyes: Optional (10mm)
Step by step Pattern
Body:
- Start with a magic ring with the green yarn.
- Crochet 6 single crochets (sc) into the magic ring and pull tight to close the ring.
- Increase by crocheting 2 sc in each stitch around. You should now have 12 sc.
- Continue crocheting in sc around, increasing by 1 sc in each stitch around. You should now have 18 sc.
- Continue crocheting in SC around without increasing for 4 rounds.
- Stuff the body firmly as you go.
- Change to the cream yarn and crochet 1 round in SC without increasing.
- Continue crocheting in sc around, increasing by 1 sc in each stitch around. You should now have 24 sc.
- Continue crocheting in SC around without increasing for 4 rounds.
- Stuff the head firmly.
- Decrease by crocheting 2 sc together around. You should now have 18 sc.
- Decrease by crocheting 2 sc together around. You should now have 12 sc.
- Decrease by crocheting 2 sc together around. You should now have 6 sc.
- Fasten off and leave a long tail for sewing.
Shell:
- Make a magic ring with the green yarn.
- Crochet 6 sc into the magic ring and pull tight to close the ring.
- Increase by crocheting 2 sc in each stitch around. You should now have 12 sc.
- Continue crocheting in sc around, increasing by 1 sc in each stitch around. You should now have 18 sc.
- Continue crocheting in sc around, increasing by 1 sc in every other stitch. You should now have 24 sc.
- Continue crocheting in sc around, increasing by 1 sc in every third stitch. You should now have 30 sc.
- Continue crocheting in SC around without increasing for 4 rounds.
- Fasten off and leave a long tail for sewing.
Legs (make 4):
- Make a magic ring with the green yarn.
- Crochet 6 sc into the magic ring and pull tight to close the ring.
- Increase by crocheting 2 sc in each stitch around. You should now have 12 sc.
- Continue crocheting in SC around without increasing for 4 rounds.
- Stuff the leg firmly.
- Fasten off and leave a long tail for sewing.
Tail:
- Make a chain of 15 stitches with the green yarn.
- Single crochet (sc) back down the chain.
- Continue crocheting in sc around, increasing 1 sc in each end for 2 rounds. You should now have 19 sc.
- Continue crocheting in SC around without increasing for 5 rounds.
- Fasten off and leave a long tail for sewing.
Assembly:
- Sew the legs to the body.
- Sew the shell to the body, positioning it to cover the back and top of the body.
- Sew the tail to the body.
- Attach the safety eyes or embroider the eyes with black yarn and white yarn (optional) for the whites of the eyes.
- Embroider the mouth with black yarn.
Tips:
- You can adjust the size of the turtle by using a crochet hook or yarn weight of a different size.
- You can add other details to your turtle, such as stripes on the shell or spots on the body.
- Be sure to stuff the turtle firmly so it keeps its shape.


Leave a Reply