
Explore the Crochet Plush Cat Amigurumi Pattern! Ideal for beginners, this pattern allows you to crochet a soft, plush kitty. It's delightfully easy to make and is the perfect gift or charming keepsake.

Crochet Pluch Cat Amigurumi Pattern
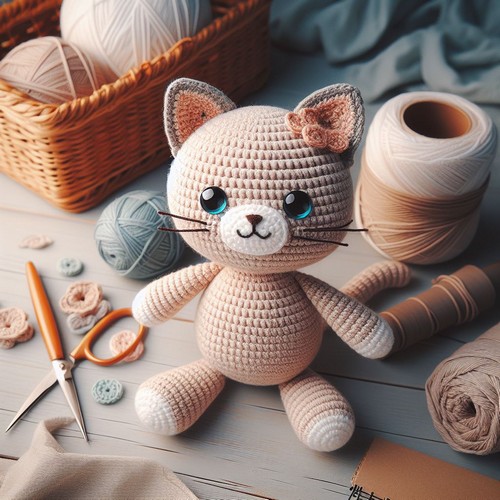
The Crochet Plush Cat Amigurumi Pattern designs a lovable, squishy cat with an adorable look. It has a round face, vibrant eyes, and a friendly smile that warms the heart. Its body is perfectly shaped and has charming, short limbs to make it hug-worthy. Created with soft yarn and simple crochet stitches, it's comfortable to touch and attractive to look at. This charming plush cat, with its cute features, makes it an excellent toy for children or a lovely addition to any cat collection.
Making the Crochet Pluch Cat Amigurumi
-
Materials:
- Yarn in various colors: gray, white, green, black, pink
- 3.25mm crochet hook
- Polyester fiberfill stuffing
- Black safety eyes
- Yarn needle
- Stitch marker

Step by step Pattern
-
Legs (make 4):
- Using gray yarn, make a magic ring and chain 3.
- Work 11 sc into the ring, join with a slip stitch to the top of the first sc.
- Place a stitch marker and work 24 rounds of SC in a spiral.
- Do not stuff.
-
Feet (make 4):
- Using gray yarn, chain 5.
- Work 4 sc in the next chain 4 spaces.
- Turn and work 3 sc in the back loops only of the previous row.
- Work 1 sc in each of the next 2 sts.
- Slip stitch in the top of the turning chain to close.
- Repeat steps 1-4 for another foot.
- Sew the feet to the bottom of the legs.
-
Body:
- Using gray yarn, make a magic ring and chain 3.
- Work 11 sc into the ring, join with a slip stitch to the top of the first sc.
- Place a stitch marker and work in a spiral, increasing 6 sc evenly each round for 7 rounds.
- Work 28 rounds without increasing.
- Stuff the body firmly.
- Continue working 28 rounds without increasing.
- Decrease 6 sc evenly in each round for 6 rounds.
- Do not stuff.
- Pull the remaining yarn tight and fasten it off.
-
Head:
- Using gray yarn, make a magic ring and chain 3.
- Work 11 sc into the ring, join with a slip stitch to the top of the first sc.
- Place a stitch marker and work in a spiral, increasing 6 sc evenly each round for 6 rounds.
- Work 22 rounds without increasing.
- Stuff the head firmly.
- Continue working 22 rounds without increasing.
- Decrease 6 sc evenly in each round for 5 rounds.
- Do not stuff.
- Pull the remaining yarn tight and fasten it off.
-
Ears (make 2):
- Using pink yarn, chain 8.
- Single crochet in the second chain from the hook and each chain to the end.
- Turn and single crochet in each stitch across.
- Repeat rows 3-4 three more times.
- Fasten off and weave in ends.
-
Tail:
- Using gray yarn, chain 40.
- Fasten off and weave in ends.
-
Assembly:
- Sew the head to the body.
- Sew the ears to the top of the head.
- Sew the legs to the body, positioning them evenly.
- Attach the safety eyes.
- Sew the tail to the back of the body.
-
Face:
- Using black embroidery floss, embroider a nose and mouth on the face.

Tips:
Here are some additional tips for crocheting amigurumi:
- Use a smaller crochet hook than you would normally use for the yarn weight. This will help create a tighter fabric and prevent the stuffing from showing through.
- Stuff the amigurumi firmly as you go. This will help it keep its shape.
- Be careful not to overstuff the amigurumi, as this can make it difficult to sew the pieces together.
- When sewing the pieces together, use a small needle and invisible thread. This will help the seams look neat and tidy.


Leave a Reply