
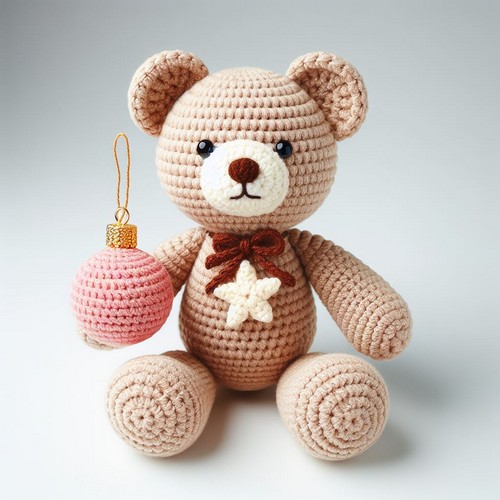
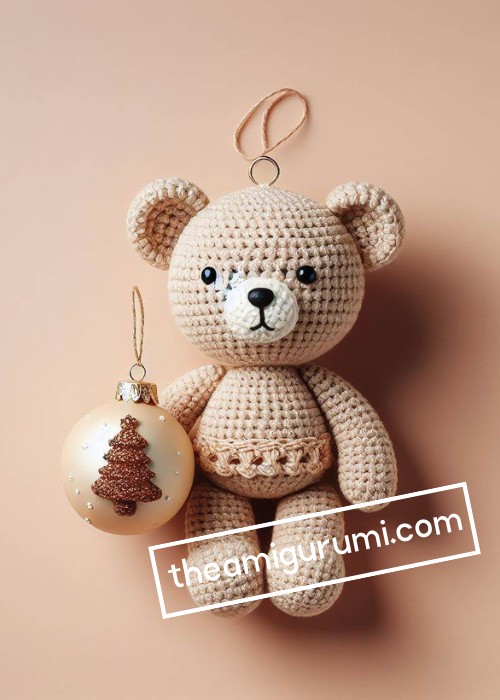
This charming Crochet Ornament Bear Amigurumi Pattern lets you craft an adorable handmade bear. It's the perfect project for crochet lovers, ideal for ornamenting spaces or gifting. Walkthrough step by step to create this cute bear with your own hands.
Crochet Ornament Bear Amigurumi Pattern
The Crochet Ornament Bear Amigurumi Pattern is a delightful guide for making a heartwarming bear ornament, perfect as a charming addition to any festive decor. This step-by-step amigurumi pattern will help you create a cuddly bear embellished with festive details, like a cozy scarf and a classic Santa hat. Crafted in warm and inviting colors, this ornament bear is suitable for crocheters of all skill levels and adds a touch of handmade magic to your holiday celebrations.

Making the Crochet Ornament Bear Amigurumi
Materials:
- Brown worsted-weight yarn (amount not specified in the pattern, but you’ll likely need around 100 yards)
- Black worsted-weight yarn (a small amount for the facial features)
- Crochet hook size H-8 (5.00 mm)
- 9 mm safety eyes
- Fiberfill stuffing
- Tapestry needle
- Scissors
Gauge:
- Gauge is not specified in the pattern, but it’s important to crochet tightly to create a firm ornament that will hold its shape well.
Finished size:
- Approximately 3 inches tall
Step by step Pattern
Head:
- With brown yarn, make a magic ring and crochet 6 single crochets (sc) in the ring. Do not join.
- Place a stitch marker in the first stitch.
- Sc in each stitch around. Join with a slip stitch (sl st) to the first sc, being careful not to twist. (6 sc)
- Increase 6 stitches evenly around. Join with a sl st to the first sc. (12 sc)
- Sc in the next 2 stitches, increase 1 stitch around. Join with a sl st to the first sc. (18 sc)
- Sc in the next 3 stitches, increase 1 stitch around. Join with a sl st to the first sc. (24 sc)
- Sc in each stitch around for 3 rounds. (24 sc)
- Sc in the next 4 stitches, decrease 1 stitch around. Join with a sl st to the first sc. (20 sc)
- Sc in the next 3 stitches, decrease 1 stitch around. Join with a sl st to the first sc. (16 sc)
- Sc in the next 2 stitches, decrease 1 stitch around. Join with a sl st to the first sc. (12 sc)
- Stuff the head firmly with fiberfill.
- Sc in the next stitch, decrease 1 stitch 6 times around. Join with a sl st to the first sc. (6 sc)
- Fasten off, leaving a long tail for sewing.
Ears (make 2):
- With brown yarn, chain 4.
- Sc in the second chain from the hook and in each remaining chain. Turn. (3 sc)
- Ch 2, sc in each stitch. Turn. (3 sc)
- Increase 1 stitch at each end. Turn. (5 sc)
- Sc in the first 2 stitches, increase 1 stitch, sc in the next 2 stitches. Turn. (6 sc)
- Sc in the first 3 stitches, increase 1 stitch, sc in the next 3 stitches. Turn. (7 sc)
- Sc in around, increasing 1 stitch at each end. Turn. (9 sc)
- Sc in the first 4 stitches, increase 1 stitch, sc in the next 4 stitches. Turn. (11 sc)
- Sc in the first 5 stitches, increase 1 stitch, sc in the next 5 stitches. Turn. (13 sc)
- Sc in around for 3 rounds. (13 sc)
- Sc in the next 2 stitches, decrease 1 stitch around. Turn. (11 sc)
- Sc in the next stitch, decrease 1 stitch around. Turn. (9 sc)
- Sc in the next stitch, decrease 1 stitch around. Turn. (7 sc)
- Sc in the next stitch, decrease 1 stitch around. Turn. (5 sc)
- Fasten off, leaving a long tail for sewing.
Legs (make 2):
- With brown yarn, make a magic ring and crochet 6 sc in the ring. Do not join.
- Place a stitch marker in the first stitch.
- Sc in each stitch around. Join with a sl st to the first sc, being careful not to twist. (6 sc)
- Increase 6 stitches evenly around. Join with a sl st to the first sc. (12 sc)
- Sc in each stitch around for 3 rounds. (12 sc)
- Stuff the legs lightly with fiberfill.
- Sc in the next 2 stitches, decrease 1 stitch around. Join with a sl st to the first sc.


Leave a Reply