
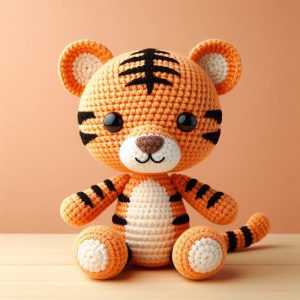
The Crochet Cat Amigurumi Pattern is a user-friendly, fun guide that allows you to create a likable and cuddly cat toy creatively.

Crochet Cat Amigurumi Pattern
The Crochet Cat Amigurumi Free Pattern is a way to make an adorable, fun cat. The pattern pays attention to cat's features: pointy ears, small button eyes, a cute nose, and little paws. It uses soft, snug yarn to ensure a cozy feel. The guide is easy to follow, with clear steps for making each part of the body, head, ears, and legs. Perfect for people who enjoy crafting, this cute amigurumi pattern is a charming item to make for free.

Making the Crochet Cat Amigurumi
Materials:
- Yarn:
- Worsted weight yarn in your main color (MC) for the body (white in the image)
- Small amounts of contrasting colors for the eyes, nose, mouth and ear tips (black and pink in the image)
- Hook: 4.0mm crochet hook
- Safety eyes: 9mm (black in the image)
- Stuffing: Polyester fiberfill
- Embroidery needle: Tapestry needle
- Other: Stitch marker, scissors

Step by step Pattern
Body:
- Start with MC, make a magic ring and work 6 sc into the ring.
- Sc in each st around (6 sts).
- Inc in each st around (12 sts).
- [Sc in next st, inc in next st] Repeat (18 sts).
- Continue increasing every other st until 30-36 sts, depending on your desired size.
- Work 8-10 rounds without increasing.
- Place a marker and work half the number of stitches you have on the body (e.g., if you have 36 sts, work 18 sts), stuff the body firmly, work the remaining stitches and join with sl st to marker.
- Continue working rounds without stuffing, decreasing 6 sts evenly spaced on each round until you have 12 sts remaining.
- Stuff your head firmly, then continue decreasing until you have 6 sts remaining.
- Cut yarn, leaving a long tail, pull yarn through remaining sts and tighten to close. Weave in ends.
Head:
- With contrasting colors (black in the image), embroider facial features: eyes, nose, and mouth.
- Glue or sew on safety eyes.
Ears (make 2):
- Make a magic ring with MC and work 6 sc into the ring.
- Sc in each st around (6 sts).
- [Sc in next st, inc in next st] Repeat around (9 sts).
- Work 5-7 rounds without increasing.
- Change to a contrasting color (pink in the image) and work 1-2 rounds.
- Cut yarn, leaving a long tail, pull yarn through remaining sts and tighten to close. Weave in ends.
Legs (make 4):
- Make a magic ring with MC and work 6 sc into the ring.
- Sc in each st around (6 sts).
- Inc in each st around (12 sts).
- Work 3-5 rounds without increasing.
- Stuff the leg lightly.
- Change to SC and work 1 round.
- Cut yarn, leaving a long tail, pull yarn through remaining sts and tighten to close. Weave in ends.
Tail:
- With MC, chain 8 sts.
- Sl st in 2nd ch from hook (7 sts).
- Sc in each st across (7 sts).
- Turn, sc in each st across (7 sts).
- Repeat rows 3-4 until the piece measures about 5 cm long.
- Cut yarn, leaving a long tail, thread the tail through a tapestry needle, and sew the tail to the body.
Assembly:
- Sew ears to the top of the head, angling them slightly forward.
- Sew legs to the bottom of the body, evenly spaced.
Finishing touches:
- You can add a cute bow around the neck or a flower.
Your adorable amigurumi cat is complete! You can customize it further by adding other details like stripes, whiskers, or a collar.
Here are some additional tips for crocheting amigurumi:
- Use tight stitches to prevent stuffing from showing through.
- Stuff the pieces firmly but evenly so they keep their shape.
- Use safety eyes, especially for young children.

More Crochet Cat Amigurumi Ideas
Little White Cat

Uses: Designed by Sabrina Silva and published on her Neko Kalico Instagram and Ravelry, this pattern offers crocheters a joyful experience in making a little feline companion. Its presence adds a gentle touch of whimsy and warmth to wherever it's placed, from a nursery's shelves to a cozy living room corner.
Materials:
- Cisne DPrimera yarn
- A 3.0 mm crochet hook
Making: This method of crocheting small, stuffed yarn creatures or objects is a defining feature of the "Little White Cat." The instructions are provided in a clear, written format, making it accessible for beginner and advanced crocheters.
Cat Gnome Ginger

Uses: The "Cat Gnome Ginger" is a charming little figure combining the love for cats and the whimsical world of gnomes into a unique decoration piece. Adored for its ability to bring a smile and a dash of joy to any room, this cheerful gnome is perfect for anyone wanting to add a touch of whimsy to their living spaces or searching for that special gift that speaks from the heart.
Materials:
- Aran yarn
- 2.75mm crochet hook
Making: The construction begins with the gnome's hat, often a defining character feature. Using chosen yarn colors, the hat is crocheted to the desired specifications, incorporating patterns or designs that add personality to the gnome. Following the hat, the gnome's body crocheted. This part usually involves creating a simple, cylindrical shape that is the base to which other components are attached. Once all components (hat, body, cat features) are complete, they are assembled to form the final "Cat Gnome Ginger." This step requires careful stitching to secure all parts and ensure the figure retains its shape. The finishing touches include adding facial features, such as eyes, a nose (often in pink for a cute effect), and additional decorative elements like a beard or a heart-shaped pattern on the body to emphasize the gnome's whimsical and caring nature.
Dumpling Cat

Uses: The "Dumpling Cat" finds its place either nestled among your cozy room accents or held tightly in the joy of a child. Its presence adds a dash of whimsy and an air of comfort to every corner it occupies. Its sweet demeanor and soft texture are comforting, making it a favorite companion among kids and adults.
Materials:
- Aran yarn
- 3.75mm crochet hook
Making: This engaging endeavor starts by working from the bottom up, meticulously sculpting every detail. As the creation begins to take shape, each stitch contributes to forming its unique rounded shape. Just like making a real dumpling, it's all in the folding and careful shaping!


Leave a Reply