
Embark on an exciting DIY adventure with our Awesome Bunny Amigurumi Pattern. Crochet your own adorable bunny using this easy-to-follow crochet guide. No matter your skill level, you're one stitch away from creating a cute, cuddly companion.

Crochet Awesome Bunny Amigurumi Pattern
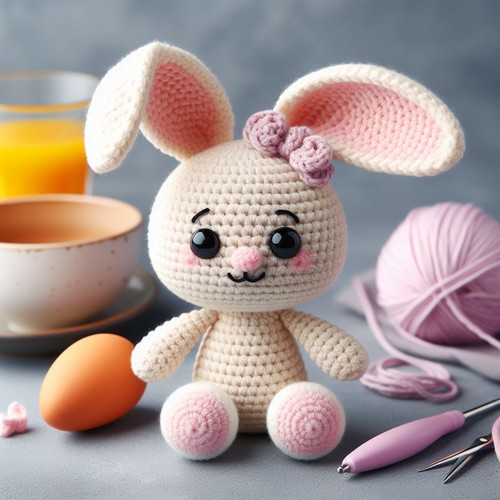
The Crochet Awesome Bunny Amigurumi Pattern flaunts an adorable design. It's mesmerizing to see the round-shaped crochet bunny with its cute, pointy ears and little paws. This bunny features a fluffy tail and is adorned in various natural-toned colors, making it appealing for kids. Intricate details, like the stitched eyes and nose, enhance its charm. Whether you're a veteran crocheter or an enthusiastic beginner, crafting this bunny pattern will bring you immense satisfaction.
Making the Crochet Awesome Bunny Amigurumi
- Materials:
- 3.5 oz. skin pink worsted weight yarn (MC)
- 0.8 oz. White worsted weight yarn (WC)
- Small amounts of black, dark pink, and light pink worsted-weight yarn
- 3.5 mm crochet hook
- Polyester fiberfill
- Black safety eyes (8 mm)
- Yarn needle
- Stitch marker (optional)

Step by step Pattern
- Body
-
- Using MC, make a magic ring and ch 6.
- Sl st to join, forming a circle.
- Crochet 12 sc into the ring.
- Inc in each st around (24 sts).
- Crochet 7 rnds without incs.
- Place a marker, then stuff the body firmly.
- Cont. crocheting in rnds without incs until the body reaches the desired length.
- Finish off and weave in ends.
- Head:
- With MC, make a magic ring and ch 6.
- Sl st to join, forming a circle.
- Crochet 12 sc into the ring.
- Inc in each st around (24 sts).
- Crochet 4 rnds without incs.
- Place a marker, then stuff the head firmly.
- Crochet 5 more rnds without incs.
- Dec by crocheting 2 sc together (18 sts).
- Dec by crocheting 2 sc together (12 sts).
- Finish off and weave in ends.
- Ears (make 2):
- With MC, ch 8.
- Sc back down the chain.
- Fold the chain in half and sl the sides together to form a triangle.
- Legs (make 4):
- Using MC, ch 6.
- Sc back down the chain.
- Cont. Crocheting in rnds, incing at the beg of each rnd until you have 12 sts.
- Crochet 6 rnds without incs.
- Stuff the leg firmly.
- Dec by crocheting 2 sc together (6 sts).
- Finish off and weave in ends.
- Tail:
- Using MC, ch 6.
- Sc back down the chain.
- Cont. crocheting in rnds, incing at the beg of each rnd until you have 12 sts.
- Crochet 6 rnds without incs.
- Stuff the tail lightly.
- Dec by crocheting 2 sc together (6 sts).
- Finish off and weave in ends.
Assembly:
- Sew the ears to the top of the head, positioning them evenly spaced apart.
- Attach the safety eyes to the head with black yarn.
- Embroider a small pink triangle for the nose and small black circles for the nostrils.
- Embroider a light pink curved line for the mouth.
- Sew the head to the body.
- Sew the legs to the body, two on each side.
- Sew the tail to the back of the body.
Modifications:
- To make the ears floppier, you can use chenille yarn or pipe cleaners inside the ears.
- To make the bunny hold a carrot, you can crochet a carrot using orange yarn or felt.
- To make the flower crown, you can crochet small flowers and leaves and then sew them together onto a headband.
Here are some additional tips for crocheting amigurumi:
- Use a small crochet hook (size 2.75mm or 3mm) to create a tight amigurumi fabric.
- Stuff the amigurumi firmly as you go to prevent it from being floppy.
- Be careful not to overstuff the


Leave a Reply