
Discover the Crochet Blue Bunny Amigurumi Pattern, a delightful tutorial for creating a lovable blue bunny toy. With easy-to-follow instructions, you'll master the art of amigurumi in a delightful way.

Crochet Blue Bunny Amigurumi Pattern
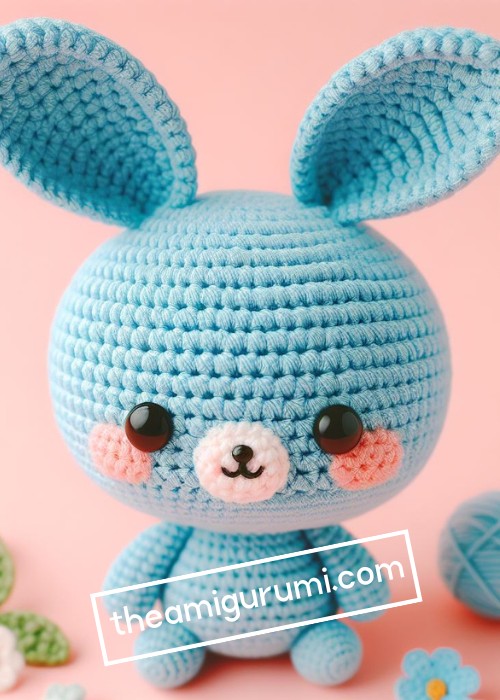
The Crochet Blue Bunny Amigurumi Pattern creates a charming, cuddly bunny with a plump body and lively features. Its head has two long, floppy ears and big, expressive eyes that give it a gentle appearance. The small, round arms and legs add to the bunny's playfulness. Made with a soft, blue yarn, the crochet stitches provide a warm, inviting texture. Customize your crochet bunny amigurumi by choosing your favorite colors and making it a lovely keepsake for any child's room.
Making the Crochet Blue Bunny Amigurumi
Materials:
- Yarn:
- Worsted weight yarn in light blue (MC)
- Small amounts of worsted weight yarn in white, black, pink, and light pink (for details)
- 3.25mm crochet hook
- Tapestry needle
- Black safety eyes (8mm)
- Fiberfill stuffing

Step by step Pattern
Body:
- Start with MC yarn: Make a magic ring and crochet 6 sc into the ring.
- Increase: Crochet 2 sc in each stitch, for a total of 12 sc.
- Continue crocheting in rounds: Increase 6 sc evenly each round until you have 36 sc.
- Crochet without increasing: Crochet 6 rounds without increasing.
- Stuffing: Start stuffing the body with fiberfill as you crochet.
- Continue crocheting rounds: Continue crocheting rounds without increasing until the body reaches the desired length, finishing with a decrease round by crocheting 2 sc together in each stitch.
- Tie off and weave in ends.
Head:
- Switch to MC yarn: Make a magic ring and crochet 6 sc into the ring.
- Increase: Crochet 2 sc in each stitch, for a total of 12 sc.
- Continue crocheting in rounds: Increase 6 sc evenly each round until you have 24 sc.
- Crochet without increasing: Crochet 4 rounds without increasing.
- Stuffing: Start stuffing the head with fiberfill as you crochet.
- Add eyes: Add safety eyes (or embroider eyes using black yarn).
- Continue crocheting rounds: Crochet 2 more rounds without increasing.
- Decrease: Decrease to 18 sc by crocheting 2 sc together every other stitch.
- Finish off and weave in ends.
Ears (x2):
- Use MC yarn: Chain 8 stitches.
- Turn and sc in each stitch.
- Decrease: Decrease to 7 sc by crocheting 2 sc together at the end of the row.
- Repeat rows 2-3 until you have 3 sc remaining.
- Finish off and weave in ends.
Arms (x2):
- Use MC yarn: Chain 12 stitches.
- Turn and sc in each stitch.
- Continue crocheting in rounds, without increasing, until the arm reaches the desired length.
- Finish off and weave in ends.
Legs (x2):
- Use MC yarn: Chain 15 stitches.
- Turn and sc in each stitch.
- Continue crocheting in rounds, without increasing, until the leg reaches the desired length.
- Finish off and weave in ends.
Tail:
- Use MC yarn: Chain 10 stitches.
- Turn and sc in each stitch.
- Decrease to 9 sc by crocheting 2 sc together at the end of the row.
- Repeat row 3 until you have 3 sc remaining.
- Finish off and weave in ends.
Assembly:
- Sew the ears to the top of the head.
- Sew the head to the body.
- Sew the arms to the body of the bunny, positioning them slightly angled.
- Sew the legs to the body of the bunny, evenly spaced.
- Sew the tail to the back of the body.
- Nose and mouth: Using black yarn, embroider a small nose and mouth.
- Cheeks: Using pink yarn, embroider small cheeks on the face.
- (Optional) Flower: Following the pattern for the Springtime Bunny Amigurumi by Amigurumi Patterns, you can also crochet a small flower to attach to the bunny's ear.
More Crochet Blue Bunny Amigurumi Ideas
How to Crochet an Amigurumi Bunny
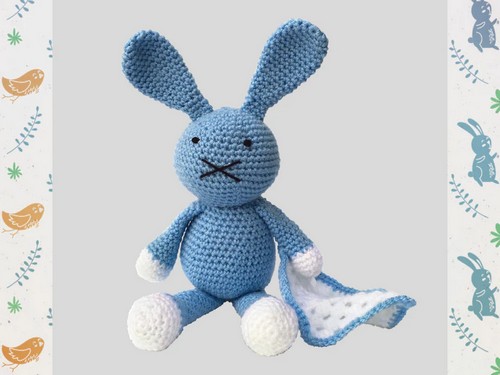
Uses: An Amigurumi Bunny's charming and gentle appearance is a cute handmade companion for children and adults. The snug stitches form a sturdy and squeezable friend, perfect for a cozy cuddle or to adorn a nook in your home, bringing a touch of homemade love to your space.
Materials:
- Aran yarn
- 3.5mm crochet hook
Making: The head begins with a magic circle, progressing through a series of increases and decreases to form a spherical shape. Features like the eyes and mouth are added after the head is filled with stuffing, using black yarn to stitch on the desired expressions. The body follows a pattern similar to the head, starting with a magic circle and incorporating increases to achieve the desired width before decreasing from the body's base. The blanket is an optional accessory, starting with a magic circle and crochet stitches, progressing in rounds to create a square or rectangular shape. With all parts completed and filled as necessary, they are sewn together, starting with attaching the head to the body.
Sleepy Bunny Amigurumi Free Crochet Pattern
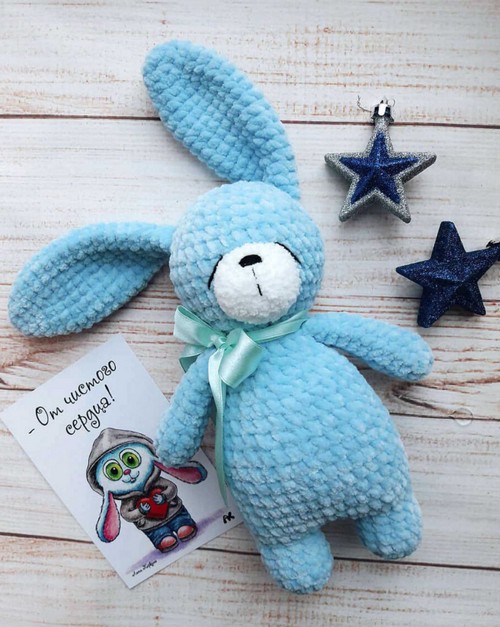
Uses: It's a buddy for cozy nights and a magical friend for imaginative play. Children adore its gentle face for playtime and bedtime, while adults find a sweet, nostalgic charm in its stitches.
Materials:
- Thinner, smooth yarn
- 5mm crochet hook
Making: You start by making two identical legs using a chain and single crochet stitches, then progress without cutting the yarn to begin the body. Continuing from the second leg, you crochet in the round to gradually shape the body, utilizing simple increases and decreases to form the torso. The head formed directly from the body without detaching the yarn, using a sequence of rounds that increased and decreased to create a spherical shape. After all parts are crocheted, the assembly involves attaching the arms and tail to the body and the ears to the head. Final touches include embroidering the eyes and nose to bring personality to the Sleepy Bunny.
How To Crochet Amigurumi Bonny Bunny
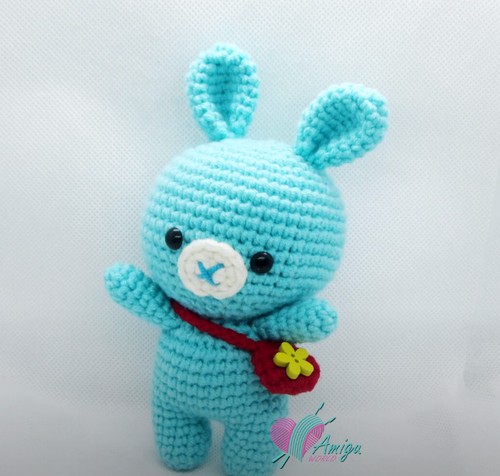
Uses: Follow this simple, easy-to-grasp tutorial and introduce yourself to the engaging world of Amigurumi; you'll have your very own Bonny Bunny in no time! As a warm and fuzzy décor, it brings a charming, positive vibe to any space.
Materials:
- yarn
- 4mm crochet hook
Making: Amigurumi projects often begin with the head or body crocheted in the round. This usually starts with a magic ring and involves a series of increases to form a sphere, followed by regular rounds, then decreases to shape the piece. After the individual components (head, body, limbs, ears, and any additional elements like a tail or accessories) are made, they're assembled and sewn together. This step requires careful placement to ensure the bunny has a symmetrical and cohesive look. Facial features and other details (eyes, nose, mouth) can be added using safety eyes, embroidery, or felt pieces.


Leave a Reply